What Firefly can do
Firefly is a development platform for connecting sensors and actuators: a no-code web dashboard, per-panel calibration and averaging, a rule-based automation engine, data logging and MQTT/Home Assistant integration — all self-contained on the board, no server and no cloud required.
Here are some example applications you can build with the Firefly development board. This electronic kit allows enthusiasts and professionals to experiment with various applications, from simple projects to more complex systems. With the Firefly, you can develop devices such as light controllers, environmental monitoring systems, and many other innovative projects. Let your creativity run wild and explore everything you can build!
Get in touch if you have a project in mind and want to discuss what you need.
Firefly application examples.
Distant sensor network (board-to-board UDP)
When sensors are far from the main controller, you don't need to run long wires — let the boards talk over WiFi. Give the main Firefly the OLED display, buzzer and relays, and scatter small bare boards next to each sensor. Each remote board creates panels for its sensors and marks them as UDP publishers; the main board subscribes to them with udp_remote input panels. From that point on they are treated like local panels: dashboard cards, OLED readings, automation rules, logging and Home Assistant discovery all work the same as if the sensor were wired in.
Example: a soil-moisture probe in the garden and a water-level sensor in the tank both publish their values over WiFi. The Firefly in the kitchen shows them on its display, and a rule like IF soil_moisture < 20 THEN zone1 = 1 starts watering — no hub, no cloud, just the boards talking to each other.
Liquids dispensing system.
The inspiration for this one came as I over flowed my pool a couple of times so I decided to rig this simple setup. It consists on a solenoid valve to turn on and off the flow of water and a flow sensor that uses a hall effect sensor and outputs negative pulses on each revolution. Both parts are very affordable and easy to get.
The setup is very straight forward.
Hardware connection diagram
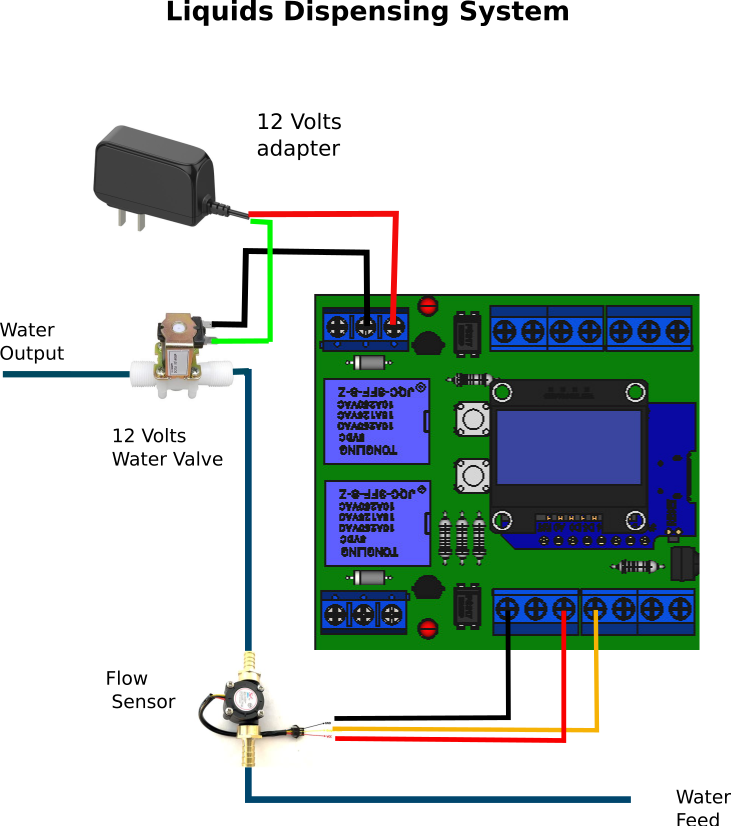
Simple hardware example.
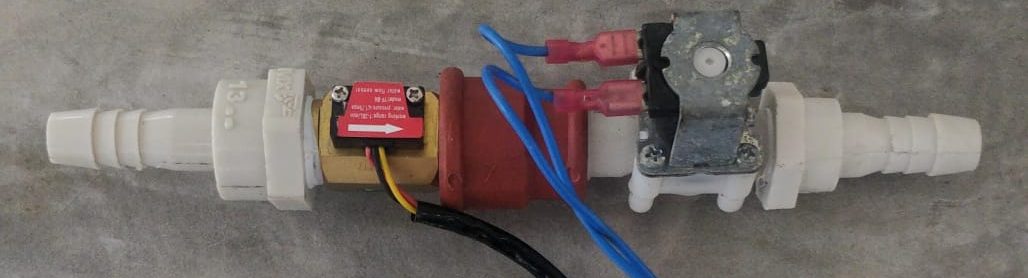
Dispensing Panel
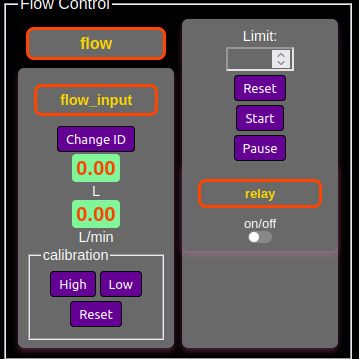
Once you have the hardware ready, go to the Firefly dashboard of your
device and click New Panel. Create two panels: an input
with the flow driver on the pin wired to the sensor's
pulse output, and an output panel on the pin driving the
valve relay (e.g. D3). The flow sensor counts pulses by interrupt, so use
any pin except D0 or A0. Both cards appear on the dashboard as soon as
they are created.
Calibration uses the input panel's Low / High / Reset buttons: press
Reset (this also zeroes the pulse counter), open the
valve from the valve panel's switch while you fill a container of known
capacity, then close it, press High and enter the
container's capacity. The panel now reads in liters, with a live
liters/min rate beside it.
To dispense automatically, add a program with a rule such as
rule main IF dispensed >= 2 THEN SET valve = 0 once,
which closes the valve at 2 liters — rules are evaluated every 50 ms, so
the valve shuts within milliseconds of the limit, not on the next screen
refresh. Open the valve to start a cycle; the rule ends it. This same
pattern works for any sensor whose output is pulses relative to a
quantity. Prefer an adjustable target? Add a number
panel called target and compare against it instead of a
fixed value.
Automatic Watering System
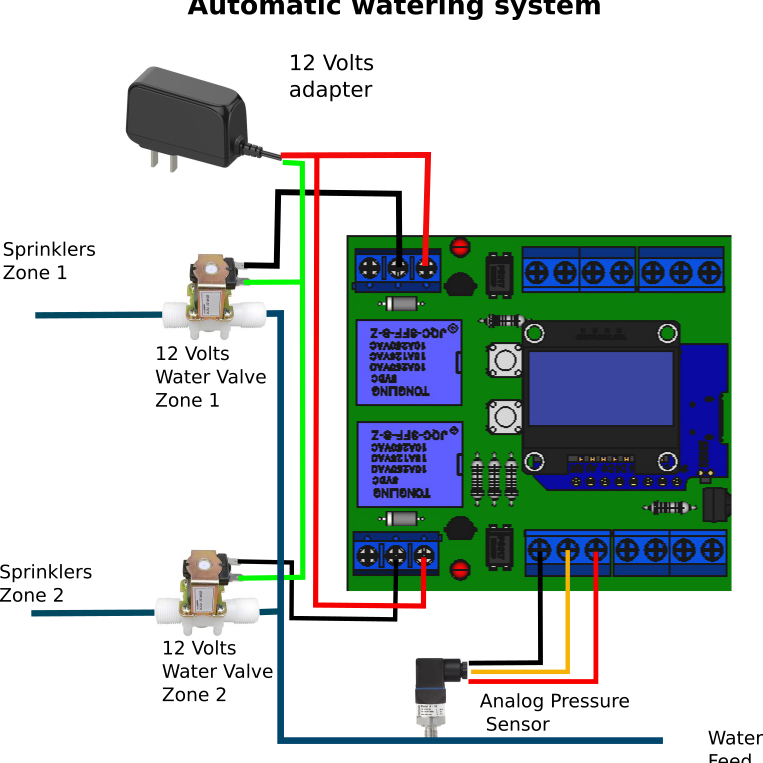
This is a watering system that can be built with very easy to source components. Normally you wouldn't need a pressure sensor for such a device as many installations have a constant water supply and in that case the timers are enough for this device. In places where the municipal supply or the well pump only runs on a schedule, the pressure sensor makes sure the timers don't start until there is good pressure in the system.
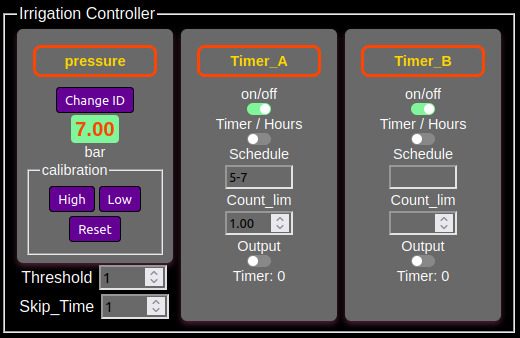
In this case the system has 2 zones, it waits until the pressure reaches a threshold ( to not start the timers until there is good pressure in the system ) and then starts the timer_A for zone 1 and when that is done it starts the timer_B for zone 2, skip_time is the programmable period of time until the next cycle.
Irrigation Panel
Once your hardware is ready, create one timer panel per
zone (D3 and D4 drive the two relays on the Firefly board) plus an
input with the analog driver on A0 for the pressure
sensor.
Timers take a schedule of alternating off/on periods
in seconds, starting from off: 5-10 means 5 seconds off,
10 seconds on. Combinations like 5-10-3-8 run longer
sequences, and the count limit stops the timer after that many full
passes (0 = run forever). For a simple 5-minute watering, use
0-300. Switch a timer to hours mode and you enter clock
times for on and off instead of periods.
To wait for pressure before watering, gate the timers with rules
instead of starting them by hand, e.g.
rule main IF mains > 20 THEN SET zone1 = 1 once: zone 1
runs when the mains come up, and a second rule chains zone 2 after it.
With 24/7 mains pressure you can skip the sensor and just run the two
timers. Make the threshold adjustable from the dashboard with a
number panel instead of a fixed value.
Logged charts, no cloud account.
As an added bonus Firefly logs the pressure readings to a CSV file on
the board itself — tick the panel's Log button, set the interval in the
Logger card, and chart the data on the built-in graph page straight from
the dashboard. If you run your own server, set the logger host and the
board uploads the file there for alerts (e.g. water is on) and long-term
storage. No cloud account, no third-party database.

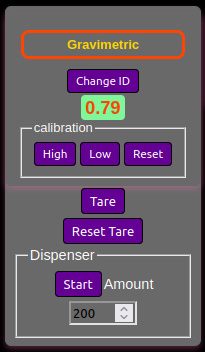
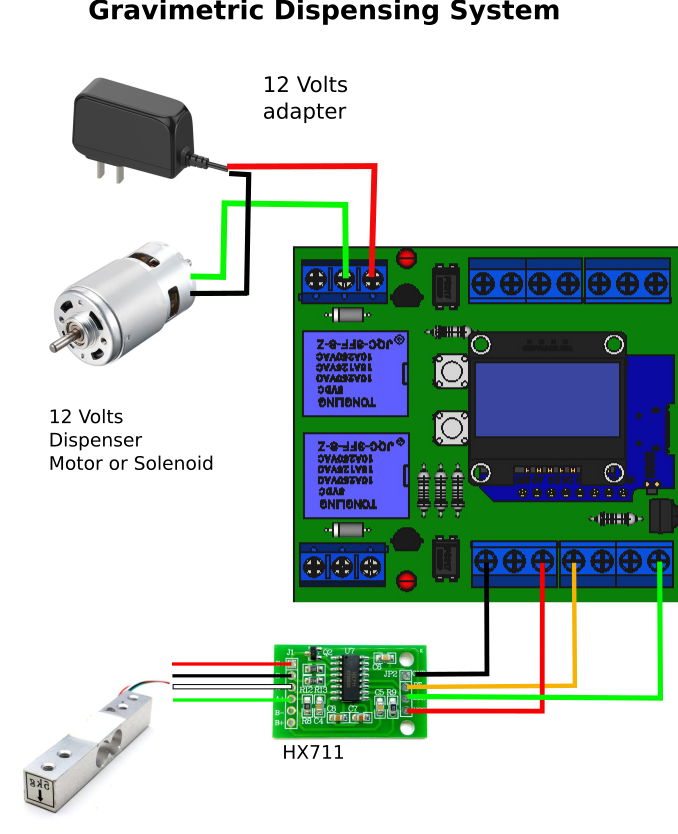
Gravimetric Dispensing System
A gravimetric dispensing system measures and dispenses materials by weight rather than volume. Wire a load cell through an HX711 board (DT + SCK to any plain GPIO, 3.3 V power with common ground) and create an input panel with the hx711 driver: it reports raw counts, and the usual two-point calibration maps them to weight.
Gravimetric Panel
Press New Panel, name it, choose input with the hx711 driver and the
two pins, and the card appears. Calibration is the standard procedure:
with the empty container on the scale press Low and enter 0 (tare), add
a known weight, press High and enter its value. Drive the dispenser
mechanism (screw, conveyor, valve) from an output panel with a rule such
as rule main IF dispensed >= target THEN SET motor = 0
once, where target is a number panel you adjust from
the dashboard.